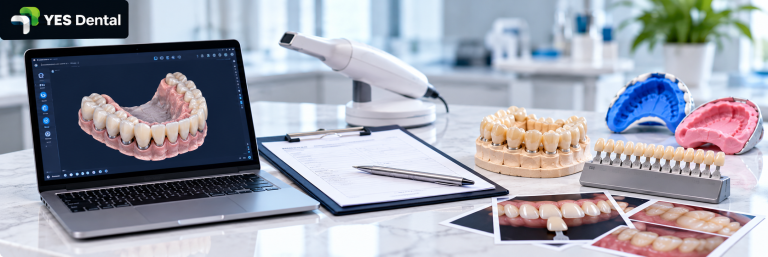
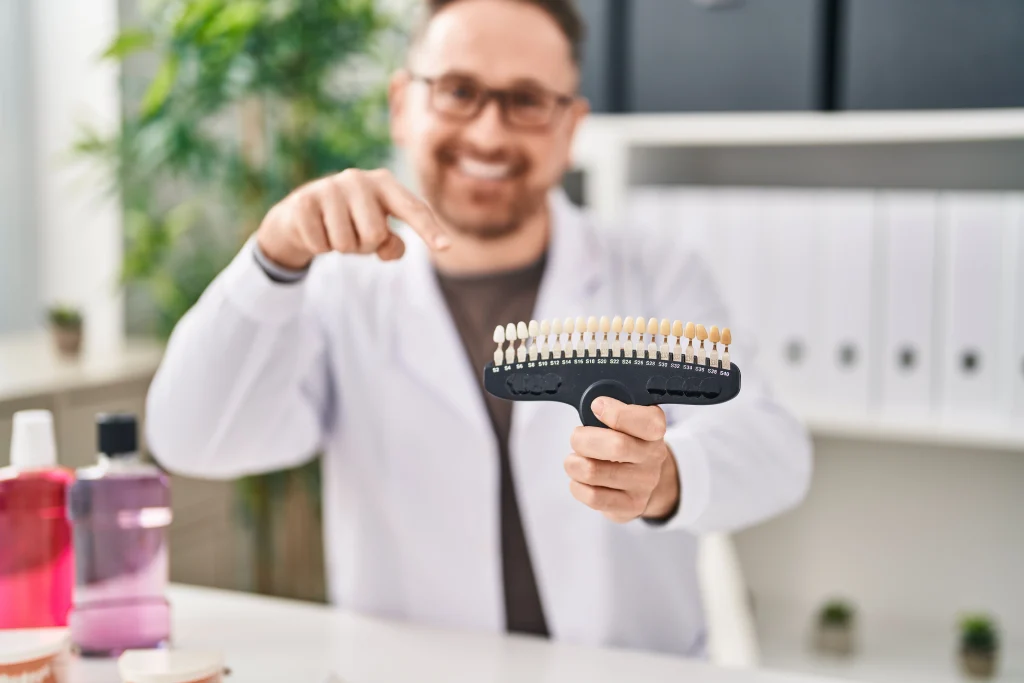
Accurate tooth shade selection is essential for natural-looking crowns, bridges and veneers. Even when the correct shade code is selected, the final restoration may look different from the adjacent teeth if lighting, tooth hydration, translucency or stump shade is not recorded properly.
For dentists, the best approach is to take the shade before tooth preparation, photograph the selected shade tab beside the tooth, and communicate the details clearly on the laboratory prescription.
How do you take and communicate tooth shade to a dental laboratory?
To take tooth shade accurately, select the shade before tooth preparation and prolonged drying, use a shade guide agreed upon with your dental laboratory, and photograph the shade tab beside the natural tooth under consistent lighting. Record the shade-guide system, tooth-zone differences, translucency, surface characteristics and stump shade where relevant. Send these details with a clear laboratory prescription so the dental technician can better understand the intended restoration.
Key Takeaways
- Take tooth shade early in the appointment, before preparation and prolonged drying.
- Use consistent, colour-balanced lighting and clean, hydrated teeth.
- Photograph the shade tab beside the tooth in the same plane and lighting.
- Record translucency, surface texture and individual tooth characteristics, especially for anterior restorations.
- Share the prepared tooth’s stump shade when it may affect the final restoration.
- Confirm the shade-guide system used by your dental laboratory.
1. Why Does a Dental Crown Shade Not Match the Natural Teeth?
A shade mismatch does not necessarily mean the laboratory made an error. The result can be affected by how the shade was selected, the lighting conditions, the information provided with the case and the characteristics of the restoration material.
Natural teeth are not a uniform colour. Their appearance can vary between the cervical, middle and incisal thirds. Translucency, surface texture, gloss and internal characterisation also influence how a tooth looks.
A shade code provides an important starting point, but it cannot communicate every visual detail. Photographs and specific written instructions help the dental technician understand the intended result.
2. How Should Dentists Prepare Before Taking Tooth Shade?
Before selecting the shade, standardize the clinical conditions as much as possible.
| Factor | What to do | Why it matters |
|---|---|---|
| Lighting | Use consistent, colour-balanced lighting and avoid mixing different light sources | Lighting changes the perceived colour of teeth |
| Background | Use a neutral background and remove brightly coloured items from the immediate field | Strong colours may influence visual perception |
| Tooth hydration | Take the shade before prolonged drying or tooth preparation | Dehydrated teeth can appear lighter and more opaque |
| Cleanliness | Clean the teeth and remove surface deposits where appropriate | Plaque and stains can affect the apparent shade |
| Timing | Select the shade early in the appointment | Prolonged procedures and drying may affect perception |
| Patient position | Seat the patient upright and position the teeth at a comfortable viewing level | Viewing angle can change reflected light |
3. How to Take Tooth Shade for a Crown: Step-by-Step
Step 1: Prepare the setting
Check the lighting, background, tooth cleanliness and hydration before beginning. Keep the conditions as consistent as possible.
Step 2: Use a shade guide compatible with your laboratory
Choose a shade guide that your dental laboratory recognises, such as an appropriate VITA shade guide or another agreed system. Confirm the guide and shade system with the laboratory so the recorded code can be interpreted correctly.
Step 3: Make a quick visual comparison
Compare the natural tooth with the shade tabs for a few seconds at a time. Rest your eyes by looking at a neutral grey surface between comparisons. Prolonged staring can reduce your ability to distinguish subtle colour differences.
Step 4: Evaluate different tooth zones
Compare the cervical, middle and incisal thirds separately. These regions may differ in colour, brightness and translucency.
Record separate shades when the differences are clinically relevant.
Step 5: Check under different lighting conditions
When practical, compare the tooth under more than one suitable light source, such as colour-balanced operatory lighting and daylight. Differences may become apparent under changing illumination.
Step 6: Get a second opinion
Ask a colleague or dental assistant to assess the shade when possible. A second opinion can help identify differences that may be overlooked during the initial assessment.
Step 7: Record and photograph the result
Write down the shade system and code, then take the shade photographs immediately. Include the shade tab beside the tooth and add any relevant notes for the laboratory.
4. Dental Shade Photography: What Photos Should You Send to the Dental Lab?
A well-composed photograph can provide valuable information beyond a shade code. However, the photograph should support—not replace—the recorded shade and clinical notes.
| Photograph | What to capture | What it communicates |
|---|---|---|
| Shade-tab photograph | Place the selected tab beside the tooth in the same plane and lighting | A visual reference for shade comparison |
| Full smile or retracted view | Include adjacent and opposing teeth where relevant | The tooth’s appearance in the surrounding dentition |
| Close-up photograph | Focus on the tooth being restored | Surface texture and individual characteristics |
| Optional additional-light photograph | Capture the tooth under another suitable light source | How the appearance may change under different lighting |
Tips for Better Shade Photographs
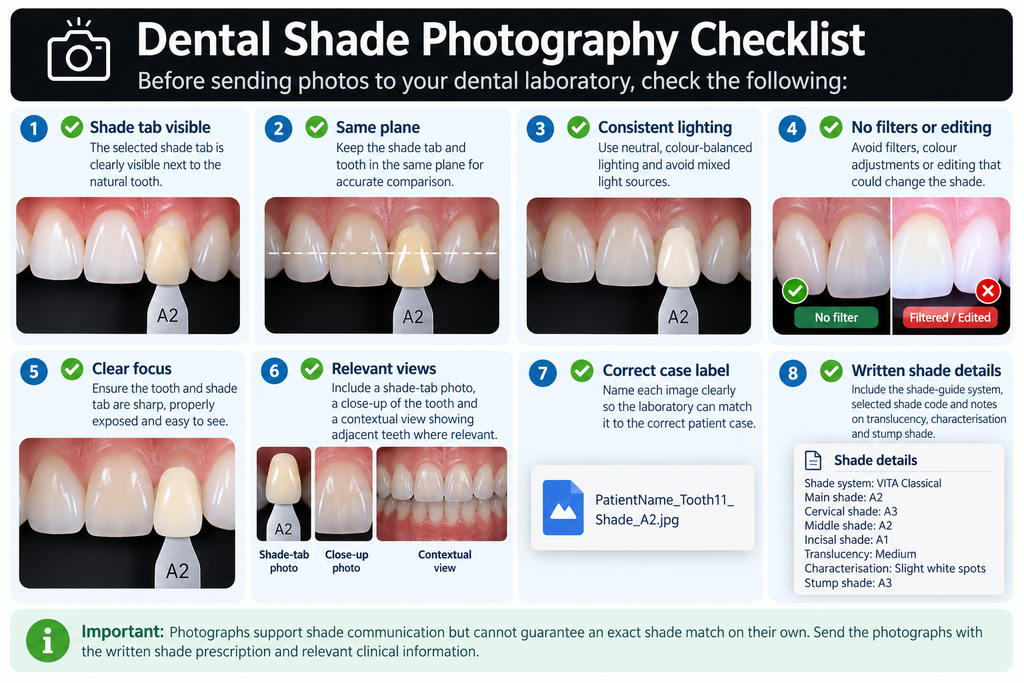
5. What Details Should You Record Besides the Tooth Shade Code?
For anterior crowns, veneers and other appearance-sensitive cases, a single shade code may not provide enough information.
Include the following details where relevant:
- Translucency: Describe the incisal edge or other areas as having high, medium or low translucency.
- Characterisation: Note features such as white spots, craze lines, mamelons or a darker cervical region.
- Surface texture: Describe whether the surface appears smooth or has visible natural texture.
- Gloss: Indicate whether the tooth has a high-gloss or more matte appearance.
- Value: Record the perceived brightness, as a mismatch in brightness can be especially noticeable.
- Adjacent teeth: Explain whether the restoration should match a particular neighbouring tooth or the overall appearance of the smile.
For a complex anterior case, a simple tooth sketch with arrows pointing to specific features can help communicate the intended result.
6. What Is Stump Shade in Dentistry, and Why Is It Important?
Stump shade refers to the colour of the prepared tooth or abutment beneath the planned restoration. Depending on the restoration material, its thickness and translucency, this underlying colour may influence the final appearance.
This information is particularly important when the prepared tooth is dark or discoloured, or when a metal post, core or build-up is present.
| Clinical situation | Information to share |
|---|---|
| Prepared tooth with a relatively normal colour | Record the stump shade using an agreed shade reference or photograph |
| Dark or discoloured preparation | Record the stump shade and flag the possible need for masking |
| Metal post, core or discoloured build-up | Clearly describe the underlying structure so material and opacity can be considered |
| Implant abutment | Record the abutment material and colour where relevant |
Share the stump shade with your laboratory and ask whether the planned material and restoration thickness are appropriate for the underlying color. The laboratory can then advise on suitable options based on the case requirements.
For more information about material selection, read our dental crown materials guide.
7. What Information Should a Dental Lab Prescription Include?
A clear prescription reduces ambiguity and helps the technician understand the clinical objective.
Include these details when relevant:
- Shade system and code: Name the guide or system and record the selected tab.
- Shade by tooth zone: Record cervical, middle and incisal shades if they differ.
- Translucency: Describe the desired translucency.
- Characterisation: Record distinctive features and attach a sketch if useful.
- Stump shade: Include the prepared tooth or abutment shade and flag any masking concerns.
- Photographs: Attach clearly labelled shade-tab, close-up and contextual photographs.
- Specific requests: Explain whether the target is a particular adjacent tooth, the overall dentition or a requested brightness.
- Contact details: Provide a reliable number so the technician can clarify questions before proceeding.
For highly aesthetic cases, ask whether a shade try-in or bisque try-in is available before the final finishing stage. Availability depends on the laboratory’s workflow and the type of restoration.
Copy-and-Use Shade Prescription Checklist
- Shade system:
- Main shade code:
- Cervical shade:
- Middle shade:
- Incisal shade:
- Translucency:
- Surface texture and gloss:
- Characterisation:
- Stump shade:
- Specific masking concerns:
- Target tooth or adjacent-tooth reference:
- Photographs attached:
- Special instructions:
- Dentist/contact number:
8. Common Tooth Shade-Taking Mistakes
| Mistake | Possible result | How to improve |
|---|---|---|
| Taking shade after preparation | Dehydration may alter perceived colour | Record the shade before preparation |
| Using only one artificial light source | The restoration may appear different under other lighting | Check under suitable, consistent lighting conditions |
| Looking at the tab for too long | Visual fatigue may reduce colour discrimination | Compare briefly and rest your eyes |
| Sending only a shade code | The technician lacks information about translucency and characterisation | Add photographs and written notes |
| Omitting stump shade | The underlying colour may influence the final restoration | Record and communicate the preparation shade |
| Using a different shade-guide system from the laboratory | The recorded code may be interpreted differently | Confirm the shade system in advance |
| Sending filtered or colour-edited photographs | The image may misrepresent the tooth’s appearance | Use consistent settings and avoid colour editing |
9. Helpful Habits for More Consistent Shade Communication
- Keep your shade guide in good condition and check it regularly for wear or damage.
- Photograph every anterior case where shade detail is important, even when the initial shade seems straightforward.
- Compare the planned restoration with the adjacent teeth, not only with the shade guide.
- If whitening is planned, coordinate shade selection with the whitening treatment and allow the shade to stabilise according to appropriate clinical guidance.
- Review the finished restoration under suitable lighting conditions.
- Contact the laboratory before fabrication if the case has unusual stump colour, demanding aesthetic requirements or unclear shade information.
Work With YES Dental
YES Dental supplies dental restorations for dentists and clinics, including crown and bridge restorations, implant restorations, removable restorations and night guards.
When submitting an aesthetic case, provide the recorded shade code, shade-tab photographs and notes on translucency, characterization and stump shade where relevant. Clear case information helps the dental team and laboratory communicate the intended result.
Explore our crown and bridge restorations or contact YES Dental to discuss your case requirements.
You can also message our team on WhatsApp.
Conclusion
Consistent shade matching begins in the clinic. Take the shade early, use clean and hydrated teeth, work under suitable lighting and photograph the shade tab beside the tooth. Record the tooth’s individual characteristics and communicate the stump shade when relevant.
A clear prescription and useful photographs give the dental laboratory better information to work with and can help reduce avoidable shade discrepancies and remakes.
Frequently Asked Questions
When should I take the tooth shade?
Take the shade early in the appointment, before tooth preparation and before prolonged drying can affect the tooth’s appearance.
Is a shade code enough for the dental laboratory?
A shade code may be sufficient for some straightforward cases. For anterior and other aesthetic restorations, photographs and notes on translucency, characterisation and neighbouring teeth provide additional context.
What is stump shade?
Stump shade is the colour of the prepared tooth or abutment beneath the restoration. It can influence the final appearance, particularly when the restoration is relatively translucent.
What lighting is best for tooth shade selection?
Use consistent, colour-balanced lighting. Where practical, assess the tooth under more than one suitable light source rather than relying entirely on a single warm or coloured light.
Should teeth be whitened before taking the final shade?
If whitening is planned, coordinate shade selection with the treatment and wait for the shade to stabilise before recording the final target, following appropriate clinical guidance.
Can a dental laboratory match the shade from a photograph alone?
A photograph is useful, but it is best combined with the recorded shade code, a shade tab in the image and clear written notes. Camera settings and lighting can affect how colour appears in photographs.